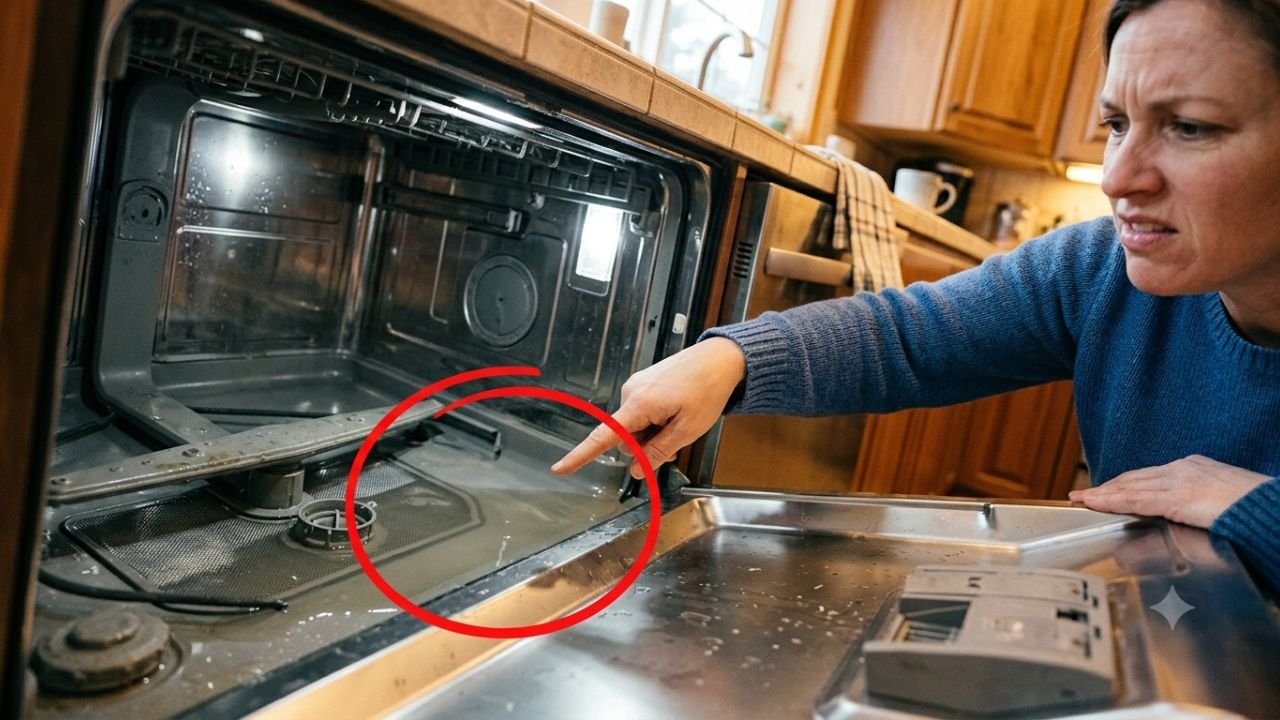
If you’ve opened the dishwasher expecting clean, dry dishes and found a puddle sitting in the bottom instead, you already know how frustrating a Whirlpool dishwasher not draining completely can be. The good news: you almost certainly don’t need a repair call yet. Nearly every case comes down to one of seven spots — most of them a five-minute check with nothing but your hands and a flashlight. This guide walks through each one in order, tells you exactly what the part looks like and where to find it, and tells you honestly when it’s finally time to call someone.
Table of Contents
Before you start: Unplug the dishwasher or flip its breaker before opening any panel, and keep a towel handy — standing water tends to spill the moment you touch the filter or hose. This is general troubleshooting guidance, not a substitute for a licensed technician; if a step below feels outside your comfort zone, it’s fine to stop there. This page may contain affiliate links; as an Amazon Associate we may earn from qualifying purchases at no extra cost to you.
Problem 1: Clogged Filter — the Top Cause of a Whirlpool Dishwasher Not Draining Completely
A dishwasher filter clogged with old food and grease is the single most common reason for this problem, so it’s worth checking first no matter what else you suspect.
- Pull out the bottom dish rack completely and set it aside — you need clear access to the floor of the dishwasher tub.
- Look down at the very bottom center or rear corner of the tub. You’ll see a round plastic cylinder, usually gray or white, about the size of a small jar lid, sitting flush with the floor — often right under or next to the spinning spray arm. That’s the filter.
- Twist this cylinder counterclockwise (lefty-loosey, same direction as unscrewing a jar lid) and lift it straight up and out. It should come out with a gentle twist and pull — you don’t need to force it. If it feels stuck, don’t yank hard; just wiggle it gently while twisting.
- Take the filter to your kitchen sink. Hold it under running water for about 30–60 seconds, turning it so water hits all sides.
- Use an old toothbrush or a soft dish brush to scrub off anything stuck to it — bits of food, grease film, or a slimy buildup. Spend about a minute scrubbing all the mesh surfaces until the water running through it looks clear, not cloudy.
- Look into the hole in the tub floor where the filter came from. There’s usually a smaller mesh screen underneath — shine a phone flashlight down if it’s hard to see. Wipe or rinse away any debris sitting on that screen too.
- Put the filter back in the same spot, push it down gently, and twist clockwise (righty-tighty) until it clicks or stops turning — it should feel snug, not loose.
- Put the dish rack back in, close the door, and run a normal cycle. Check the tub floor once it finishes — if it’s dry, this fixed it.
Problem 2: Garbage Disposal Clog or Knockout Plug
This applies if your dishwasher’s drain hose connects to your kitchen sink’s garbage disposal (most under-counter dishwashers do). You’ll know this is relevant if the dishwasher is brand new, or drainage got worse right after your garbage disposal was installed or swapped out.
- Turn on your garbage disposal (the switch is usually on the wall near your sink, or under the sink cabinet) and let it run for about 15 seconds, even with nothing visibly in it. This clears out anything blocking the shared drain path.
- While it’s running, listen closely. If you hear a loud rattling, grinding, or banging noise that’s unusual, turn the disposal off immediately — that’s a separate problem you shouldn’t ignore, and it needs its own fix before you go further.
- If your dishwasher is newly installed, or your garbage disposal was recently replaced: open the cabinet under your sink and look at the side of the disposal unit facing the dishwasher — there’s a small round inlet nipple sticking out where the dishwasher hose connects. New disposal units ship with a plastic “knockout plug” sealing this opening from the factory. If nobody removed it during installation, water physically cannot pass through — this alone causes the problem. You (or your installer) need to knock this plug out from inside the disposal before the dishwasher can drain into it. If you’re not confident doing this yourself, this is a reasonable one to hand to a plumber or the installer.
- Once you’ve run the disposal and confirmed the plug isn’t blocking it, run a normal dishwasher cycle and check the tub floor afterward.
Problem 3: Kinked or Clogged Drain Hose
A dishwasher drain hose kinked behind the cabinet is easy to miss but just as easy to fix once you know where to look.
- Unplug the dishwasher from its power source, or turn off its breaker. If it’s plugged into an outlet under the sink, just pull the plug. Also turn off the water supply valve, usually a small oval or round handle on the pipe under the sink near where the dishwasher’s water line connects.
- Open the cabinet under your kitchen sink. You’re looking for a flexible ribbed rubber or plastic hose, usually black or gray, about as thick as a garden hose, that runs from a hole in the wall or floor (where it connects to the dishwasher) up to the sink drain pipe or garbage disposal.
- Run your hand along the entire visible length of this hose, feeling for any spot where it’s sharply bent, flattened, or pinched — often caused by cleaning supplies or trash bins being pushed against it inside the cabinet. A flattened or tightly bent hose is what causes water to back up.
- Find where the hose connects to the sink drain pipe or garbage disposal — there’s a metal band (a hose clamp) holding it in place. Loosen this clamp using a flathead screwdriver (turn the screw counterclockwise) or a pair of pliers if it’s a spring-style clamp, then gently pull the hose end off the connection point.
- Take the loose end of the hose to a sink or an outdoor tap. Run warm water into it for about a minute, letting it flow all the way through and out the other end at the dishwasher — this flushes out anything stuck inside.
- Push the hose end back onto the connection point firmly, then tighten the clamp back down (clockwise) until it’s snug.
- If, while doing this, you notice the hose has a crack, a split, or a soft/mushy spot anywhere along its length, don’t reuse it — buy a replacement drain hose for your model and swap it in the same way, instead of continuing to flush the damaged one.
- Turn the water supply back on, plug the dishwasher back in, and run a test cycle.
Problem 4: Clogged Air Gap or Missing High Loop
An “air gap” is a small part some kitchens have; not every kitchen does. A dishwasher air gap clogged with mineral buildup or debris is a common, overlooked cause of poor drainage. Check your countertop next to the kitchen faucet for a short, shiny metal cylinder, about 2 inches tall and an inch wide, sticking straight up. If you see that, you have one and should follow the steps below. If you don’t see anything like that, skip to the high loop check further down.
- Grip the top cap of that metal cylinder and twist it counterclockwise to unscrew it, then lift it off.
- Underneath, you’ll find a small plastic cover — lift this out too. You’ll now be looking down into a small open chamber.
- Look inside with a flashlight for any buildup, gunk, or debris sitting in that chamber. Wipe it out with a paper towel or small brush, then pour a cup of warm water down into it and confirm it drains away freely rather than sitting there.
- Put the plastic cover and metal cap back on the same way you removed them.
- If you don’t have an air gap on your counter: instead, go back under the sink where you were working in Problem 3. Look at the drain hose again — somewhere along its path, it should be pulled up high (as high as possible, ideally attached with a zip tie or bracket to the underside of the counter or cabinet) before it comes back down to connect to the drain. This upside-down “U” shape is called a high loop, and it stops dirty water from ever flowing back into your dishwasher. If your hose runs in a low, sagging path instead, gently reroute and secure it upward in a loop before reconnecting it.
Problem 5: Faulty Check Valve
This step is a bit more involved than the ones above — if you’ve already fixed the problem in Problems 1 through 4, you likely don’t need this one. A dishwasher check valve failure is a less common but real cause when water still isn’t draining after trying everything else.
- Make sure the dishwasher is unplugged or the breaker is off before doing anything here.
- Disconnect the drain hose again the same way you did in Problem 3 (loosen the clamp, pull the hose off).
- Look inside the open end of the hose or the connection point on the dishwasher side — you’re looking for a small black rubber flap, about the size of a large coin, sitting inside the opening. This is the check valve. Its job is to let water flow out one way and stop it from flowing back in.
- Gently press on the flap with your finger or a small screwdriver — it should move easily and spring back into place. If it feels stuck, jammed, or doesn’t move at all, that’s your problem.
- The check valve is a purely mechanical part — there’s no electrical switch or multimeter test involved here. A visibly stuck, torn, warped, or missing flap is all you need to confirm it’s the problem.
- If it’s faulty, order a replacement check valve for your exact model number and swap it in the same spot, then reconnect the hose as you did in Problem 3.
Problem 6: Stuck Float Switch
A dishwasher float switch stuck by trapped debris can either stop the tub from filling or stop it from draining, so it’s worth checking even if your symptoms seem unrelated to draining at first glance.
- Open the dishwasher door and look at the floor of the tub, toward the front, near where you’d stand. You’re looking for a small white or clear plastic dome, roughly the size and shape of half a tennis ball, sitting on its own little base. That’s the float.
- Place two fingers on top of the dome and push it straight down, then let go. It should move down smoothly and pop back up on its own within a second or two, like a slow-motion button.
- If it feels stiff, doesn’t move at all, or doesn’t come back up, look closely around its base for anything trapped there — a small piece of dropped cutlery, a bottle cap, or a hardened lump of dried food are the usual culprits.
- Carefully remove whatever you find by hand, then test the float again by pressing and releasing it as in step 2.
- If it now moves freely, close everything up and run a test cycle. If it still feels stuck or doesn’t move even with nothing blocking it, the switch underneath the float has likely failed electrically — this isn’t something you can see or fix by hand, and it’s worth having a technician check it rather than guessing.
Problem 7: Failed Drain Pump
Only get to this step if you’ve gone through Problems 1–6 and the dishwasher still isn’t draining. A dishwasher drain pump not working is the least common cause, and the most involved to check.
- Run a normal cycle and stand near the dishwasher during the last few minutes, when it’s supposed to drain (this is usually right before the “done” signal). Listen carefully.
- If you hear a loud buzzing, grinding, or rattling noise during that drain phase, that tells you the pump motor is running but something is jammed or broken inside it.
- If you hear nothing at all during that phase — no hum, no motor sound — that suggests the pump motor itself isn’t turning on.
- Either way, unplug the dishwasher and turn off its water before going further. Open the dishwasher door and look at the very front bottom edge of the unit, below the door — there’s usually a thin metal or plastic strip (the kickplate) held on by a few screws.
- Remove those screws with a screwdriver and gently pull the strip off to set it aside. Behind it, you’ll see a small rectangular box connected to hoses and wires — this is the drain pump.
- Look at the pump opening for anything obviously stuck — a piece of broken glass, a chunk of plastic, or a hard clump of debris jammed in the opening. If you see something, carefully remove it by hand with the machine still unplugged.
- If the area around the pump is completely clear of debris but you heard no motor sound at all in step 3, or if you can see the internal fan-like part (the impeller) is visibly cracked or broken, the pump itself needs replacing. Because this part sits deep in the machine and involves disconnecting wires, this is the one repair on this list where it’s completely reasonable to call in a technician instead of doing it yourself — you’ve already done the hard diagnostic work by ruling out everything else.
Repair Cost: DIY vs. Professional
| Trouble Point | DIY Part Cost | US Avg. Pro Repair | Time |
|---|---|---|---|
| Filter cleaning | $0 | $90–$150 (truck roll) | 10–15 min |
| Knockout plug / disposal clog | $0 | $90–$150 (truck roll) | 10 min |
| Drain hose replacement | $15–$35 (OEM) | $120–$200 (incl. labor) | 20–30 min |
| Check valve replacement | $10–$25 (OEM) | $110–$180 (incl. labor) | 15–20 min |
| Float switch replacement | $20–$45 (OEM) | $140–$220 (incl. labor) | 20–30 min |
| Drain pump replacement | $45–$100 (OEM) | $200–$320 (incl. labor) | 30–45 min |
Prices are general US market ranges as of 2026 and vary by exact model — confirm against your model number before ordering.
Frequently Asked Questions
Why is my Whirlpool dishwasher not draining completely?
Most often it’s a clogged filter, a kinked drain hose, a blocked air gap, or — on a newly installed unit — a garbage disposal knockout plug that was never removed. A failed drain pump is possible but much less common than these simpler blockages.
How do I force my Whirlpool dishwasher to drain?
Many models let you force a drain cycle by holding down the Cancel button, or by selecting Cancel/Drain from the panel. Check your owner’s manual for the exact button sequence on your specific model.
Is a little water at the bottom of the dishwasher normal?
A small amount pooled right around the filter is normal and actually helps keep the pump seal from drying out. Standing water above the filter screen, or near the door, points to a real blockage worth working through the steps above.
For manufacturer-specific troubleshooting and drain-related error codes, Whirlpool’s own Dishwasher Not Draining support page is worth checking against your model number too.
Related: see our guides on resetting a GE dishwasher with blinking lights and Samsung Fridge Warm But Freezer Cold for more kitchen appliance fixes.

Hi, I’m Pranjul — the person behind this website.
I hold a Diploma and B.Tech in Electrical Engineering, along with hands-on training through ITI. For over 3 years, I worked as an ITI College Instructor, teaching electrical fundamentals and practical skills to hundreds of students.
Through that experience, I noticed something: most electrical troubleshooting information online is either too technical for everyday homeowners, or too vague to actually solve real problems. That’s the gap this website aims to fill.