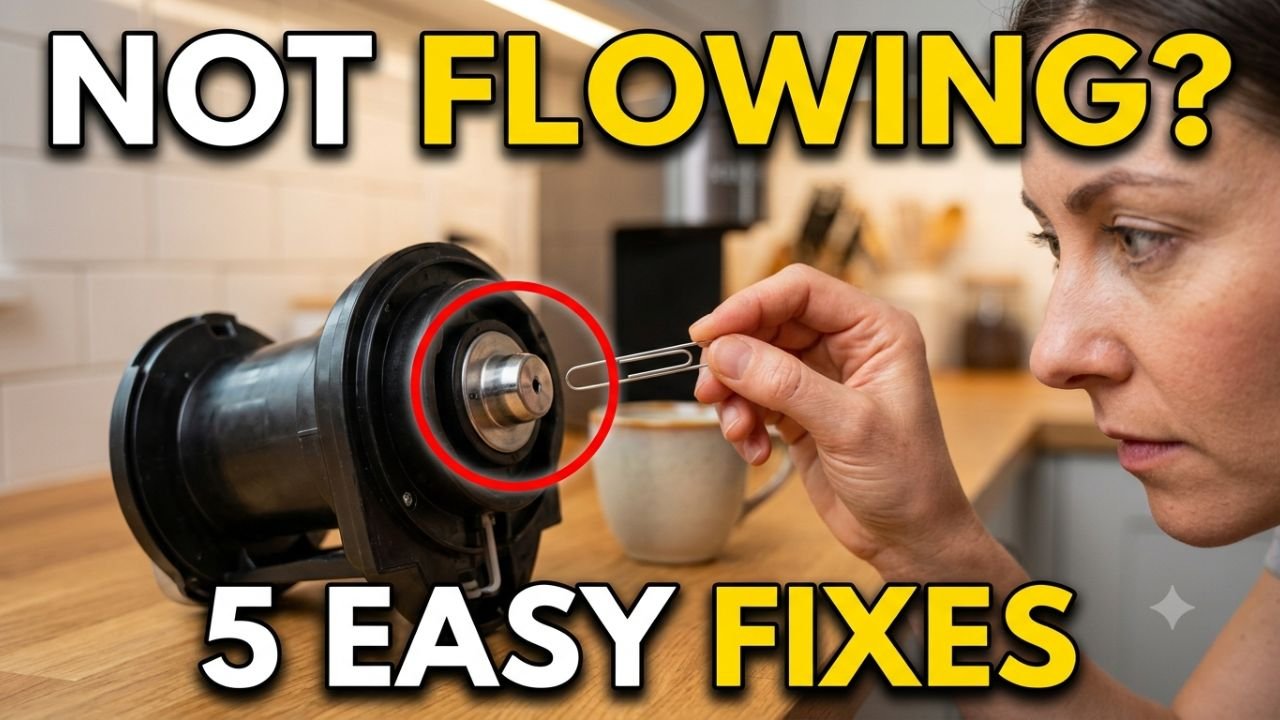
Machine hums, lights up, does everything except actually fill your cup — or it sputters out half a mug and quits. If your Keurig coffee maker coffee not flowing properly has you staring at an empty mug most mornings, the good news is that you almost never need a new machine. Whether it’s a Keurig not brewing properly at all or just a Keurig slow brew that’s gotten worse over time, nearly every case comes down to one of five spots, and the most common one costs $0 and takes under 10 minutes with nothing but a paperclip.
This guide walks through each cause in order, tells you exactly what to look for and where, and tells you honestly when it’s time to stop troubleshooting.
Table of Contents
Before you start: Unplug the machine and let it cool for at least 30 minutes before opening the brew head — the needle area sits right next to the heating element and stays warm after brewing. The needles are sharp; work carefully and don’t probe them with your bare fingertip. This page may contain affiliate links; as an Amazon Associate we may earn from qualifying purchases at no extra cost to you.
Problem 1: Clogged Exit Needle — the Top Cause of a Keurig Coffee Maker Coffee Not Flowing Properly
Symptom: Coffee sprays sideways instead of flowing straight down, or you get 2–3oz when you selected an 8oz cup. A Keurig needle clogged with dried coffee grounds is by far the most common cause of Keurig sputtering and short cups.
- Unplug the machine and let it cool for at least 30 minutes if you’ve just brewed.
- Lift the handle on top of the machine, the same way you would to load a K-Cup.
- With the handle up, gently grab the K-Cup pod holder — the round basket-like part where the pod normally sits — and lift it straight up and out of the machine.
- The pod holder comes apart into two pieces: an upper part and a lower funnel-shaped part. Pull them apart from the sides (some models twist apart instead of pulling — try a gentle pull first, then a twist if it doesn’t separate).
- Look at the lower funnel piece. At its narrow bottom point, you’ll see a small metal tube sticking out — this is the exit needle, and it’s what’s most often clogged.
- Straighten out a paperclip so you have a thin, rigid piece of metal to work with.
- Insert the tip of the paperclip into the opening at the base of the exit needle and wiggle it gently side to side to break up dried coffee grounds. You don’t need to worry about damaging anything here — this part is solid plastic and metal, built to be poked.
- Hold the paperclip at a slight downward angle while you work so loosened debris falls out and away, rather than getting pushed deeper into the needle.
- Once you’ve worked the clip around a few times, rinse both pieces of the pod holder under running water at your kitchen sink, using a bit of dish soap if there’s visible buildup, until the water runs clear through the needle opening.
- Set both pieces aside to air dry, then reassemble the pod holder by pushing the two halves back together.
- Place the pod holder back into the machine and press down until you hear or feel a click, confirming it’s fully seated.
- Lower the handle, and run one water-only brew cycle (no K-Cup) on the largest cup size to flush out anything still loose inside. Discard that cup of water, then brew a real cup to test.
Problem 2: Clogged Entrance Needle
Symptom: The “Perform Needle Maintenance” prompt on newer displays, or brew time that’s crept from around 30 seconds to over a minute — often alongside the sputtering from Problem 1, since both needles tend to clog around the same time.
- With the machine unplugged and the pod holder removed (same starting point as Problem 1), raise the handle portion of the machine as high as it will go — don’t force it past its natural stopping point.
- Look straight up underneath the raised handle. You’ll see one small metal spike with tiny holes on its sides — on some 2.0-style models, there may be two needles up here instead of one, so check both if that’s the case.
- This is the entrance needle — its job is to puncture the foil top of the K-Cup and inject hot water into it.
- Take your straightened paperclip and gently insert it into the small side holes of the needle — not the very center of the spike, just the holes on its sides. Rotate the clip gently a few times in each hole.
- Important: avoid forcing the paperclip into the central channel of the needle itself. That center pathway carries hot water under pressure and has a delicate seal around it — forcing something into it can cause a leak that ends up needing the whole brew head replaced. If you feel real resistance, stop; you’re likely hitting the machine’s structure, not a clog.
- Wipe the area around the needle with a damp cloth to catch any loosened grounds.
- Lower the handle, replace the pod holder as described in Problem 1, and run a water-only test cycle before brewing coffee again.
Problem 3: Reservoir Not Seated or Intake Valve Clogged
Symptom: The pump makes a loud buzzing or motor noise when you hit brew, but little or no water actually comes out — a classic case of Keurig water not flowing despite the machine sounding like it’s working.
- Unplug the machine.
- Lift the water reservoir straight up and out of its slot on the side or back of the machine.
- Empty any remaining water into the sink.
- Look at the underside of the reservoir, where it sits down onto the machine — there’s a small circular opening, the intake valve, where water passes through to the pump.
- Rinse this opening under warm water and use a soft brush (an old toothbrush works well) to clear away any visible mineral crust or debris around the valve.
- Refill the reservoir partway with clean water and set it back into its slot, pressing down firmly until it sits flush and doesn’t wobble — a reservoir that isn’t fully seated is one of the most overlooked reasons for a “pump runs, no water” symptom.
- Plug the machine back in and run a water-only test cycle to confirm water is moving through properly before brewing coffee.
Problem 4: Internal Water Line Clog
Try this only if Problems 1 through 3 didn’t resolve it — it’s a bit more involved, but still doesn’t require opening the machine’s casing.
- Unplug the machine and remove the water reservoir completely, setting it aside.
- Standing at your kitchen sink, turn the machine completely upside down over the basin.
- Tap firmly on the bottom of the machine with the flat of your hand a few times. This helps break up mineral deposits that have settled in the internal line — be prepared for some water to come out at this point, which is normal.
- Set the machine upright again and locate the small nozzle or spout where the water reservoir normally connects — on older models this connection point is near the top of the reservoir slot, and on newer models it’s typically lower down.
- Fit the end of a standard drinking straw snugly over that nozzle.
- Blow a short, firm burst of air through the straw into the nozzle. This helps clear an air pocket or loosened debris sitting in the internal tubing between the reservoir and the pump.
- Refill the reservoir at least halfway, reseat it firmly, and run a water-only test cycle to check whether flow has improved.
Problem 5: Mineral Scale Buildup
Symptom: No sudden failure — brewing has just been getting slower and weaker over weeks or months, especially if you’re on hard tap water. If a basic descale cycle didn’t fully fix things, a Keurig descale not working properly the first time usually just means the buildup needs a second full pass.
- Empty the reservoir completely and remove any charcoal water filter cartridge if your machine has one.
- Fill the reservoir with a 50/50 mix of plain white vinegar and water (a commercial Keurig descaling solution works too — just follow the ratio on its label instead).
- With no K-Cup loaded, run consecutive brew cycles on the largest cup size, discarding the liquid into the sink each time, until the reservoir runs empty. This usually takes 5 to 8 cycles.
- Refill the reservoir with plain water and run another 5 to 6 cycles to flush out the vinegar — don’t skip this, or your next several coffees will taste like the descaling solution.
- Reinstall the water filter if you use one, and brew one test cup.
- Going forward, descale every 3 to 6 months under normal use, or every 2 to 3 months if your water is especially hard — using filtered water in the reservoir slows this buildup significantly.
Keurig Coffee Maker Coffee Not Flowing Properly: Repair Cost, DIY vs. Replacement
Most of the fixes on this list — including the Keurig short cup fix in Problem 1 — cost nothing but a few minutes of your time.
| Trouble Point | DIY Fix Cost | Time | Risk Level |
|---|---|---|---|
| Exit needle clog (paperclip clean) | $0 | 10 min | Low — sharp needle, work carefully |
| Entrance needle clog | $0 | 10 min | Low — avoid the center channel |
| Reservoir / intake valve clean | $0 | 5–10 min | Very low |
| Internal water line clog | $0 | 10–15 min | Low |
| Full descale (vinegar or solution) | $0–$12 | 30–45 min (mostly passive) | Very low |
| Replacement pod holder/needle assembly | $15–$30 (OEM) | 10–15 min | Low |
| New machine (persistent pump failure) | $80–$200+ | — | — |
Frequently Asked Questions
If you’ve worked through Problems 1 through 5 above, you’ve now covered every realistic cause of a Keurig coffee maker coffee not flowing properly — the large majority of readers solve it in the first two.
Why is my Keurig not filling the cup all the way?
Almost always a clogged exit needle restricting outflow, or mineral scale narrowing the internal water lines. Clean the needle first, then descale if that alone doesn’t fully resolve it.
How do I know if my Keurig needle is clogged?
Sputtering, sideways spraying, a short cup instead of a full one, or a “Perform Needle Maintenance” prompt on newer displays are all signs. If you see loose coffee grounds pop out while cleaning with a paperclip, that confirms it was clogged.
Why is my Keurig pump buzzing but nothing brews?
Check the water reservoir first: remove it, clean the intake valve at its base, and reseat it firmly. This resolves most “pump runs, no water” cases without needing any repair.
For manufacturer-specific troubleshooting on your exact model, Home Depot’s official Keurig cleaning guide is worth checking too.
Related: see our guides on fixing a Whirlpool dishwasher that’s not draining completely and KitchenAid stand mixer troubleshooting for more kitchen appliance fixes.

Hi, I’m Pranjul — the person behind this website.
I hold a Diploma and B.Tech in Electrical Engineering, along with hands-on training through ITI. For over 3 years, I worked as an ITI College Instructor, teaching electrical fundamentals and practical skills to hundreds of students.
Through that experience, I noticed something: most electrical troubleshooting information online is either too technical for everyday homeowners, or too vague to actually solve real problems. That’s the gap this website aims to fill.